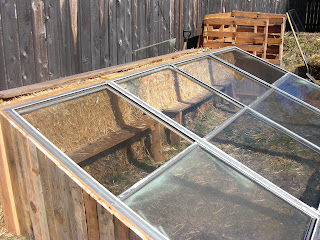
I had some old windows from a buddy that I wanted to make into a cold frame to grow some of our veggies and starts in. I have been seeing the earthen-sided green houses on facebook and I got the idea of making the back wall of the cold frame out of hay bales. I figured it would be cheaper than buying a bunch of wood and framing the back. Plus when the hay gets wet it will give off some heat, much like compost does. So I started out with three hay bales long and and two high. I also put in some scrap pieces of wood to make little shelves in between the bales. You can see the board across the top, that is what the windows will rest on.
All the wood you see on this project has either been reclaimed from the local dump or dismantled from pallets. Next, I made the angled side frame.
Here is the side frame I made. This view would be the inside of the cold frame. I made a notch in the angled board so the long window support piece can rest right in there.
Take a look at the notch in the wood for the window support piece to rest on.

Next I took pieces of wood from pallets and lined them up against the frame, penciled the angle on the back, and then I cut each board for the perfect fit.
This is the mock up side view. Not too shabby, eh? Colter man is always willing to help the cause. His little face says "You see your precious windows over there? They are dying to meet my hammer!"
Instead of digging out and leveling the whole area I just dug it out where the frame would rest.
Checking the level to see if my digging efforts are actually making it level.
Here is what it looks like with all the windows on. Notice the support board on the bottom that the windows are resting on.
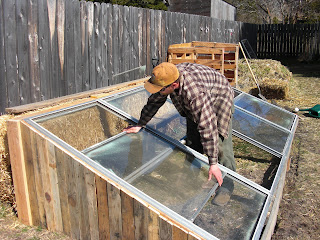
From this angle you can see that I toggled the opening of the windows so that the furthest left and right windows are open from the top and the two middle windows open from the bottom. This is for access. We figured we wouldn't be able to reach into the high pane of the middle windows anyway.
You can see here that the windows slide up and down and this is really important for temperature control. I put a thermometer in there after I finished and the temperature quickly soared to over 100 degrees. I was briefly able to mess around with it and was able to get it to hold around 80 degrees which is perfect for seed germination. There will definitely be some experimenting going on with how much to open the windows to control the temperature. I fried some of our starts already in the frame not watching the temperature. Ooops! Solar gain is quite the powerful force!


