Homemade Herbal Healing Salve
Our garden has provided us with an abundance of healing flowers this summer. I saw this as the perfect opportunity to use these flowers to make a healing salve, which will preserve the amazing healing properties of these plants in an emollient blend of oil and beeswax that can be used on minor cuts and bruises. The process is incredibly easy, and is a great introduction to salve making. First, let's look at the ingredients we will be using.
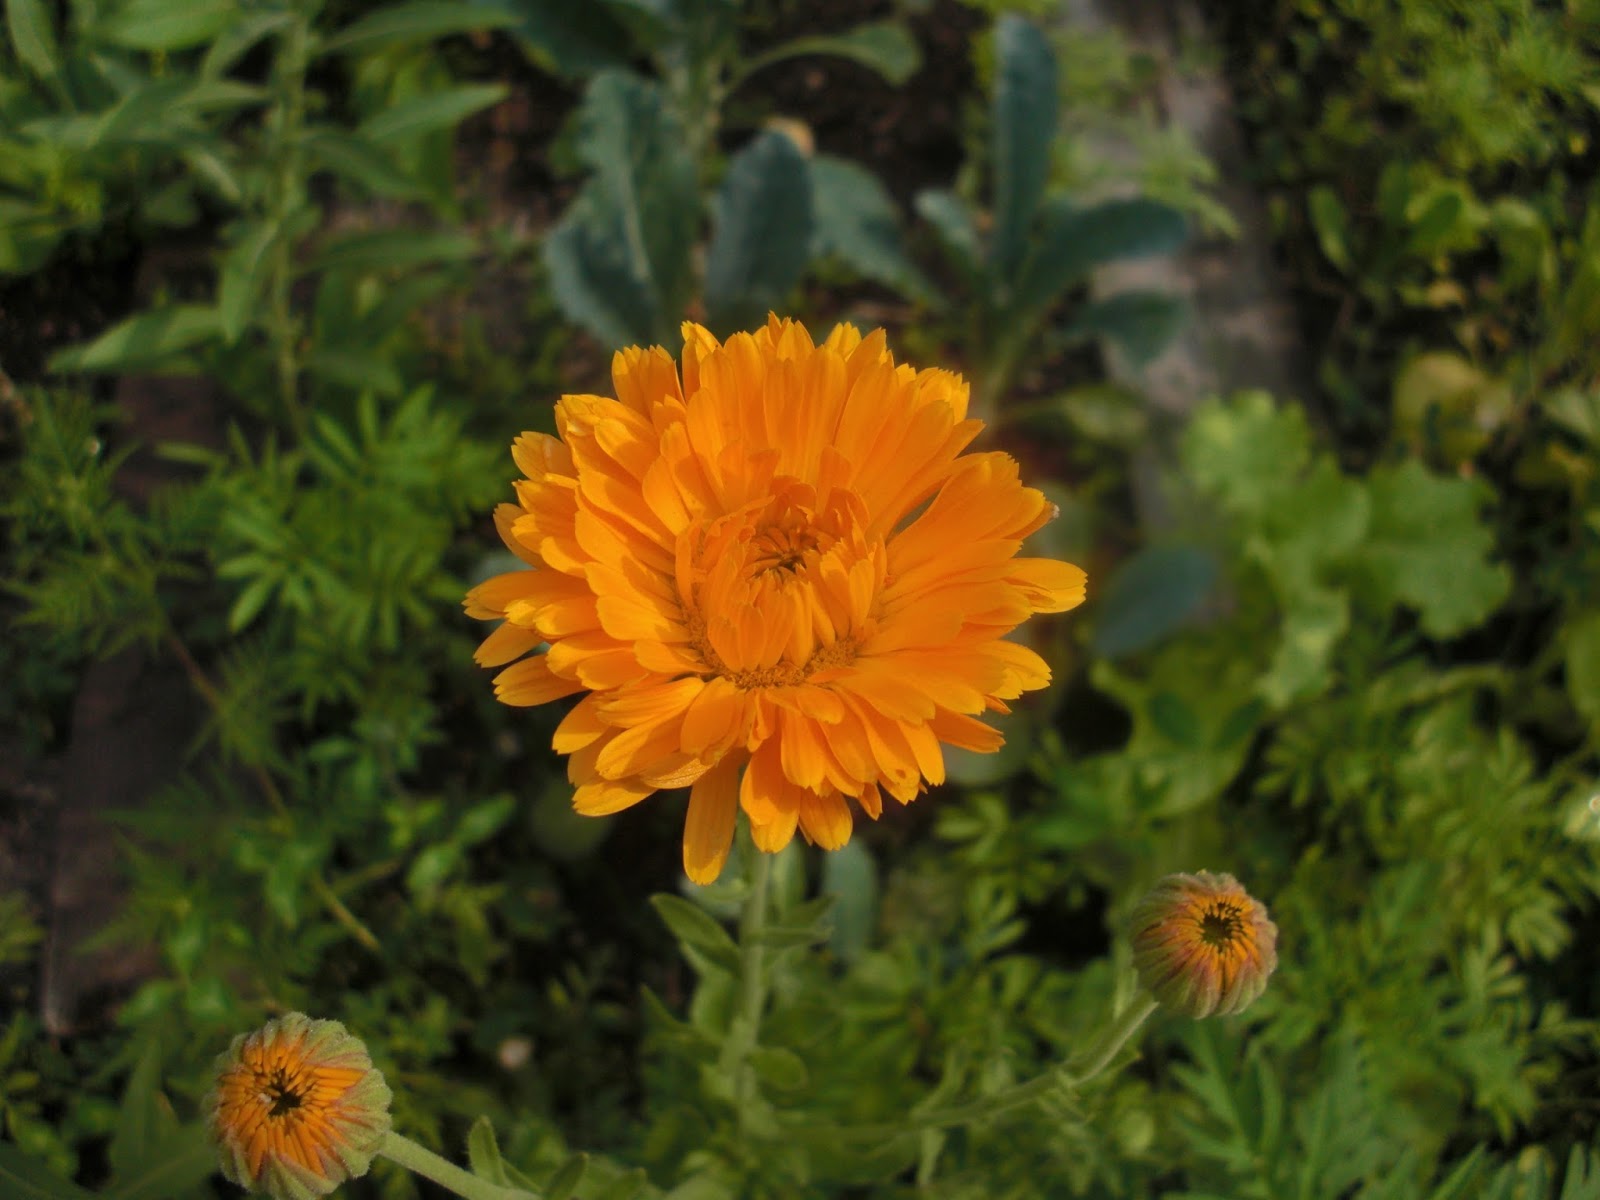
Calendula
An incredibly versatile and aesthetic plant, calendula is a great addition to your garden. Not only is calendula edible, it has also been medically proven to have topical anti-inflammatory properties [1]. The healing properties are so effective, in fact, that it was found to be superior in reducing the occurrence of acute dermatitis in patients receiving adjuvant radiotherapy for breast cancer [2].

Borage
A beautiful and exotic addition to any garden, borage is another one of my favorite "medicine cabinet" plants. Also an edible plant, borage has been scientifically proved to aid in wound healing time [3]. It has also shown anti- parasitic properties in mice infected with a parasitic protozoa [4].

Lavender
I don't think I can really give justice to the multi-faceted benefits of lavender. Aside from being a hardy, gorgeous plant in any landscape, lavender has been known to be used for centuries as an emotional and physical healer. Lavender, too, is edible (notice a theme, here?) and I've had so much fun exploring new ways to cook and bake with these delicate flower buds. Lavender also, as you may well know, has the amazing aromatic ability to calm. Scientific studies have also indicated lavender as an effective healing agent in postpartum women healing from episiotomies [5]. There is even a study that has shown various lavender oils as having antimicrobial effects against the antibiotic-resistant Staphylococcus aureus (MRSA) [6].

Honey
I'm surprised that I didn't find out about the benefits of honey sooner in life. Among the many useful medical applications of honey are wound healing properties [7], aiding in burn wound recovery [8,9], and antibacterial properties against MRSA [10].

Olive Oil
Up until creating this post, I thought that olive oil was merely a substrate in which to derive the beneficial properties of the herbs. I was pleasantly surprised to find in my research that the olive plant has free radical scavengers (anti-oxidant) properties [11]. Olive oil also contains anti-inflammatory compounds that have been compared to those of ibuprofen [12].

Beeswax
I was surprised yet again during my research to find that beeswax not only serves as a thickening and solidifying agent in this salve, but it also has been shown to successfully manage cases of dermatitis and psoriasis [13].
Step 1: Making An Herbal Oil Infusion:

 If you are using dried herbs for this step, simply fill the clean jar 2/3 full with herbs. You can use equal
parts of each herb, or more of one and less of another, whatever you chose. Leaving space at the top allows the dried herbs to expand during the infusion process. If you are using fresh herbs, cut them preferably the morning you are ready to make your oil infusion. Next you want to break up the flowers very thoroughly, because the more surface area of the plant that is exposed to oil the better an infusion you will get. Some people even prefer to lightly mash the herbs in a mortar and pestle before hand, but it's not entirely necessary. Again, you can use any amount of each of the three herbs as you would like, When using fresh plants, fill your jar all the way full with herbs.
 Once you have your herbs in the jar, fill the jar with olive oil. Using a wood spoon, gently push down the herbs to get out all the air bubbles. This assures that no mold will grow in the oil, and that all of those excellent healing properties are extracted from your plants. Voilà, you are done! Allow the oil to infuse for 3-4 weeks. Some people suggest putting your oil in a window sill, under the assumption that the heat of the sun will aid in the extraction process. Other folks suggest keeping it out of the sun, because the healing properties of these plants are very delicate, and will degrade when exposed to light. I took a middle-of-the-road approach and kept it on my counter, out of direct sunlight.
Step 2: Making An Herbal Healing Salve:

Once your oil has had time to infuse, it's time to make your salve. You will need the following items: a double boiler, a measuring/pouring cup, a wood spoon, a spatula, a whisk, cheese cloth, a clean jar, 1/2 oz beeswax, 1/2 cup infused herbal oil, 1 Tbsp raw honey (optional) and any essential oil you may want to add if you'd like (I used lavender in this one.) An adorable little helper is also recommended, but not required.
Just as a side note, you can make a number of homemade salve recipes really easily and with a number of different oils, as long as you stick with the beeswax: oil ratio of:
1 cup oil(s) : 1 ounce beeswax.
This ratio will allow you to use any combination of oils in your salve, in any amount you chose. So, let's get started!

Before you begin melting and mixing anything together, get your jars clean and dry and ready for filling. Once the salve is ready to pour, you have to act quickly, as it hardens fairly fast once removed from the stove.
To make the salve, first strain out your infused oil through cheesecloth or a sheet of muslin cloth. I prefer to strain it out right over the measuring cup I want to use.

Make sure you really squeeze out all those oils from the herbs. This will ensure that you're getting all the really beneficial healing properties out of those flowers.

Next, combine the infused oil, beeswax , and about a table spoon of raw honey (if you're using it) in a double boiler. Heat over medium until the three ingredients are melted together.

At this point, I switched to a whisk. The raw honey tends to sink to the bottom, so if you are using honey a whisk may be the best way to incorporate all your ingredients.


Once your essential oil is all mixed in, pour your salve into the clean jars. Let cool with the lid off. Secure the lid tightly once cooled. Ta-da, you're done!
Check it out, your very own homemade herbal healing salve!!!!

This size jar will last our family for well over a year. Pour into smaller containers for the perfect holiday/birthday gift. Great for sensitive skin. It worked wonders on my son's diaper rash.

Store in a cool dry place, away from direct sunlight. This recipe is shelf stable, and should last over a year if stored properly.
Studies
[1] R. Della Loggia, A. Tubaro, S. Sosa, H. Becker, St. Saar, O. Isaac. "The role of triterpenoids in the topical anti-Inflammatory activity of Calendula officials flowers." Planta Med 1994; 60(6): 516-520. Copyright Georg ThiemeVerlag Stuttgart. New York. July 31, 2013. https://www.thieme-connect.com/ejournals/abstract/10.1055/s-2006-959562
- [2] P. Pommier,
- F. Gomez,
- M.P. Sunyach,
- A. D'Hombres,
- C. Carrie and
- X. Montbarbon. " Phase III Randomized Trial of Calendula Officinalis Compared With Trolamine for the Prevention of Acute Dermatitis During Irradiation for Breast Cancer." Journal of Clinical Oncology; 2004; 22(8); 1447-1453. Copyright American Society of Clinical Oncology. July 31, 2013.
[3] Mohammad Reza Farahpour and Amir Hossein Mavaddati. "Effects of borage extract in rat skin wound healing
model, histopathological study."Journal of Medicinal Plants Research Vol. 6(5), pp. 651-656. Copyright Academic Journals 2012. July 31, 2013.
http://www.academicjournals.org/jmpr/PDF/pdf2012/9Feb/Farahpour%20and%20Mavaddati.pdf
[4] Nahid Hosseini,
Mohsen Abolhassani. "
Immunomodulatory Properties of Borage (Echium amoenum) on BALB/c Mice Infected with Leishmania major." Journal of Clinical Immunology June 2011, Volume 31, Issue 3, pp 465-471. July 31, 2013. http://link.springer.com/article/10.1007/s10875-010-9502-6
[5]
Katayon Vakilian,
Mahtab Atarha
,
Reza Bekhradi
,
Reza Chaman. "
Healing advantages of lavender essential oil during episiotomy recovery: A clinical trial." Complementary Therapies in Clinical Practice. Volume 17(1); Pages 50-53: February 2011. July 31, 2013. http://www.ctcpjournal.com/article/S1744-3881(10)00038-1/abstract
[5]
[6] Sibel Roller, Nina Ernest, and Jane Buckle. " The Antimicrobial Activity of High-Necrodane and Other Lavender Oils on Methicillin-Sensitive and -Resistant Staphylococcus aureus (MSSA and MRSA)" The Journal of Alternative and Complementary Medicine. March 2009, 15(3): 275-279. doi:10.1089/acm.2008.0268. July 31, 2013. http://online.liebertpub.com/doi/abs/10.1089/acm.2008.0268?journalCode=acm
[7] S. E. E. Efem. "Clinical observations on the wound healing properties of honey". British Journal of Surgery, 75: 679–681. doi: 10.1002/bjs.1800750718. July 31, 2013. http://onlinelibrary.wiley.com/doi/10.1002/bjs.1800750718/abstract
[8] M. Subrahmanyam. "Honey impregnated gauze versus polyurethane film (OpSiteR) in the treatment of burns — a prospective randomised study." British Journal of Plastic Surgery, Volume 46(4) 322-323. doi:10.1016/0007-1226(93)90012-Z. July 31, 2013. http://www.sciencedirect.com/science/article/pii/000712269390012Z
[9] M. Subrahmanyam. "Topical application of honey in treatment of burns." British Journal of Surgery 1991, 78: 497–498. doi: 10.1002/bjs.1800780435, July 31, 2013. http://onlinelibrary.wiley.com/doi/10.1002/bjs.1800780435/abstract?deniedAccessCustomisedMessage=&userIsAuthenticated=false
[10] S. Natarajan, D. Williamson, J. Grey, K.G. Harding, R.A. Cooper. "Healing of an MRSA-colonized, hydroxyurea- induced leg ulcer with honey." Journal of Dermataological Treatment. 2001, Vol. 12 (1); 33-36. doi: 10.1080/095466301750163563. July 31, 2013.
http://informahealthcare.com/doi/pdf/10.1080/095466301750163563
[11] Francesco Visioli, Giorgio Bellomo, Claudio Galli. "Free Radical-Scavenging Properties of Olive Oil Polyphenols. Biochemical and Biophysical Research Communications. 1998. Vol. 247 (1); 60-64. July 31, 2013. http://www.sciencedirect.com/science/article/pii/S0006291X98987356
[12] Elizabeth A. Miles, Pinelope Zoubouli, Philip C. Calder. "Differential anti-inflammatory effects of phenolic compounds from extra virgin olive oil identified in human whole blood cultures" Nutrition, 2005. Vol. 21 (3); 389-394. July 31, 2013. http://www.sciencedirect.com/science/article/pii/S0899900704003004
[13] Al-Waili, Noori S. "Topical application of natural honey, beeswax and olive oil mixture for atopic dermatitis or psoriasis: partially controlled, single-blinded study." Complementary Therapies in Medicine, 2003. Vol. 11(4); 226-234. July 31, 2013.


